NextJS 14 and Google Identity One Tab - A Journey from localhost to production - Step by Step

Biswajit NayakFollow me on Linkdin ![]()
6 Min Reading, March 13, 2024
Introduction
Enable users to sign into apps and authorize apps to use Google services. Your users can sign in to your app using their Google accounts. Users signed into Google on their device or browser get expedited authentication on your app or site. Returning users sign in automatically or with one tap or click. You even have the option to let users create new accounts with a single tap or click.
Google Identity allows us to integrate seamless login functionality into our application. It supports all platforms. In my article, I will explain how to integrate Google Identity One Tab in Next.js 14. I have also documented any issues I encountered during the integration process. For the front end, I followed the compound component design pattern.
Setting up Google Identity
Official document link for Google One Tab https://developers.google.com/identity/gsi/web/guides/display-google-one-tap
Open the Google developer link for Google Identity. https://cloud.google.com/identity?hl=en
Click on the link https://console.cloud.google.com/ to go to your Google Console page. I am assuming you already have a Google Developer account and have selected your project. If not, go to Google Console and create your account, or else you can continue reading this article.
Go to the Google Cloud API and Service page at https://console.cloud.google.com/apis/dashboard.
1. Create OAuth client ID

Click on Credentials in the left sidebar, and then click on the Create Credentials button.
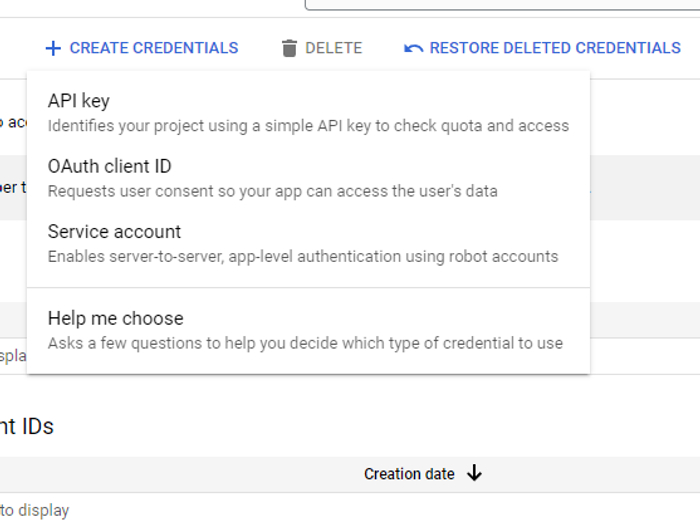
Select OAuth Client ID
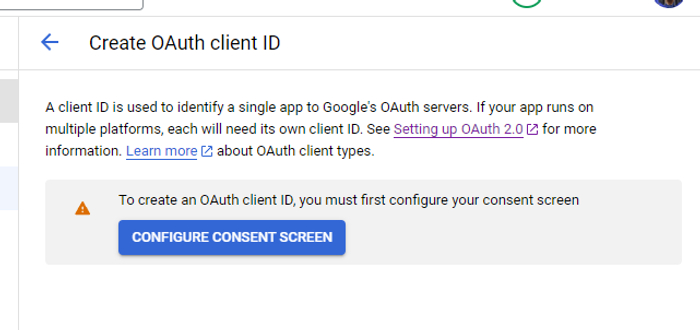
Click on configure consent screen. To create an OAuth client ID, you must first configure your consent screen
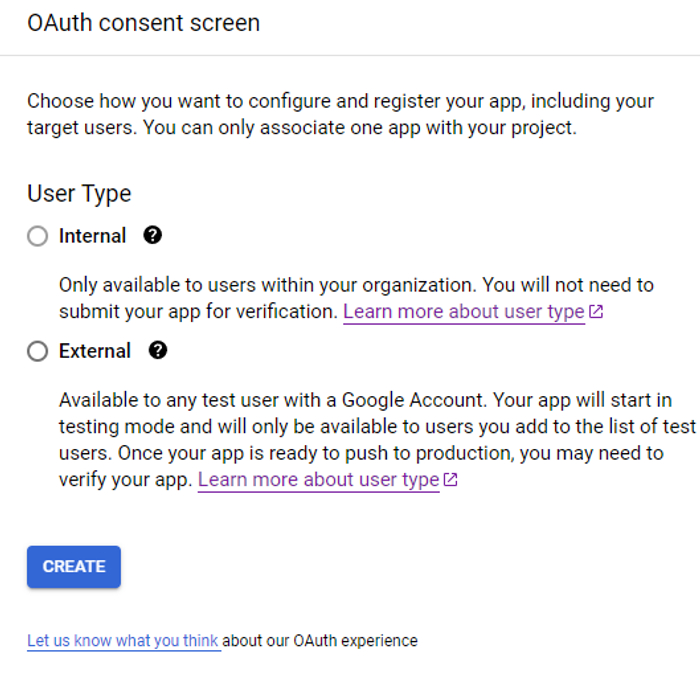
Select external and click on the create button.
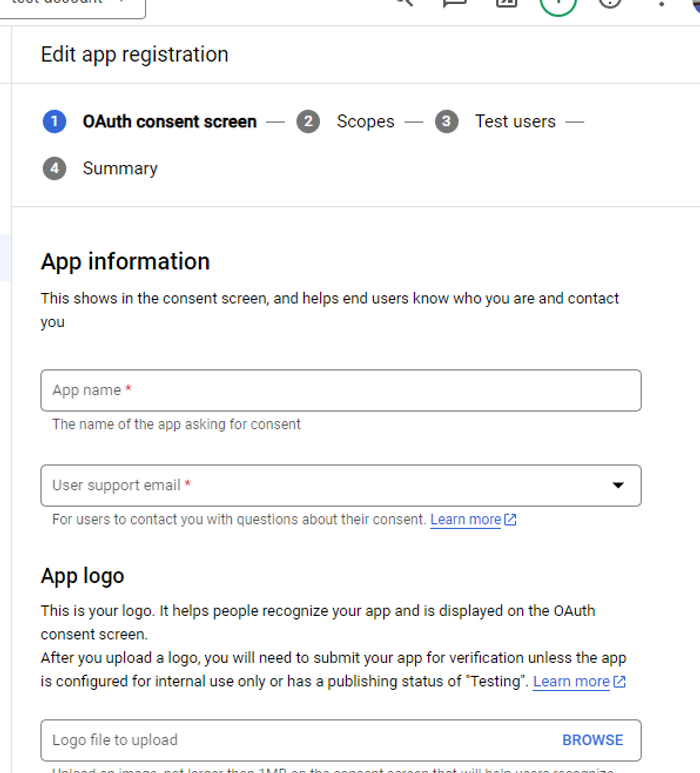
Edit the app registration page and fill in all required information.
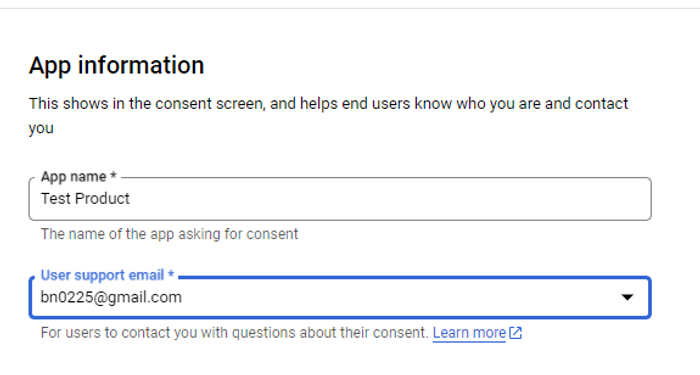
Enter your app name and user support email.
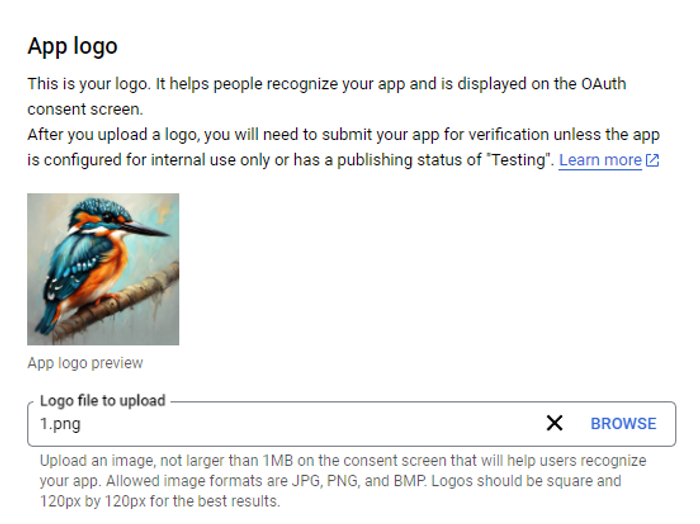
Upload your app logo.
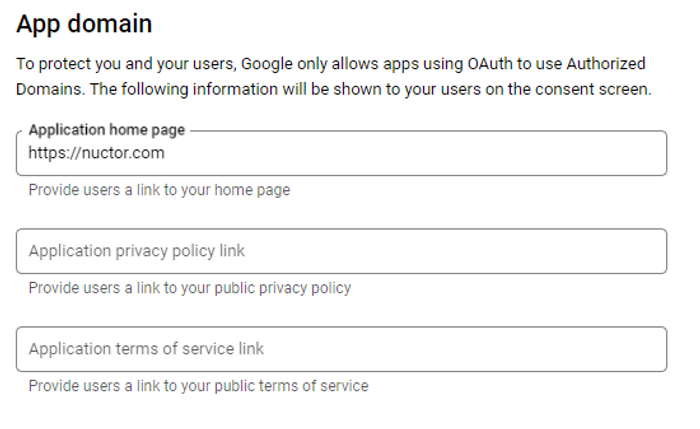
Enter the app domain details.
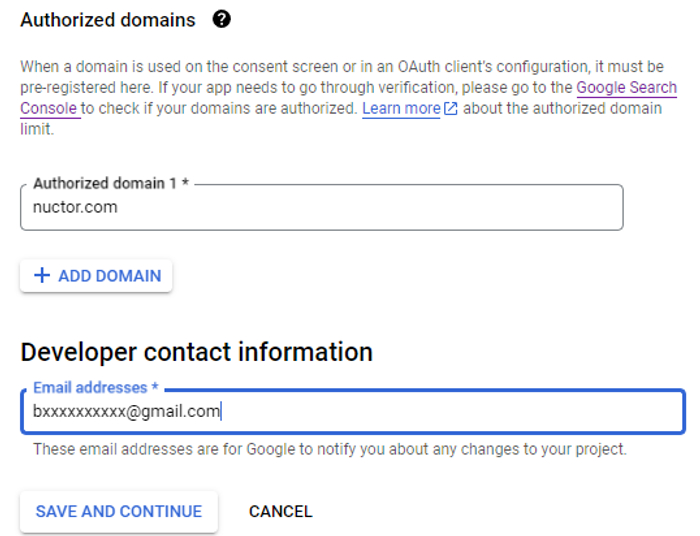
Click on Add Domain and enter your domain name in the Authorized domain 1 input. Enter your developer's contact information. Then click the save and continue button. That's all you have done to configure your consent screen.

To create an OAuth Client Id, you need to click on the credential and then select Create Credential again. Please be aware that you need to publish your app and obtain consent from Google for using the "Google One Tap" login feature. However, don't worry, you can still use the Google login button in the production environment.
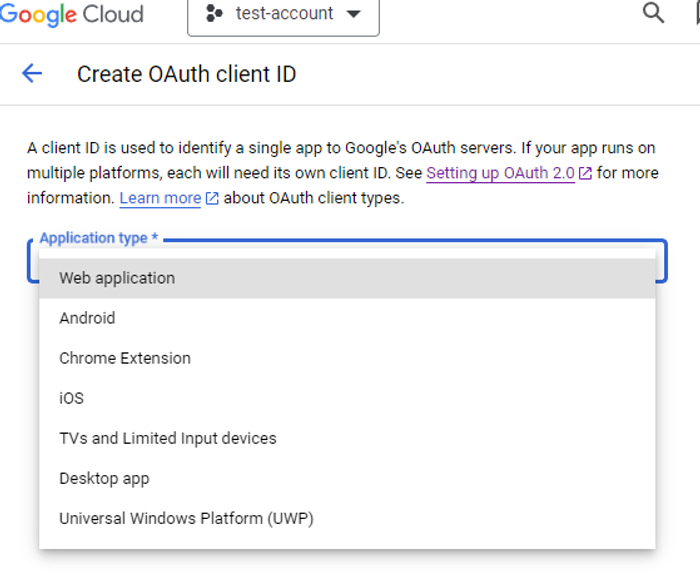
Let's proceed with creating an OAuth account. To begin, select the type of application for which you wish to integrate the Google login button. The application type refers to the platform you will be integrating the button into, such as a website or an Android app. As we are looking to integrate the Google login button in NextJs, we will be selecting the web application option.
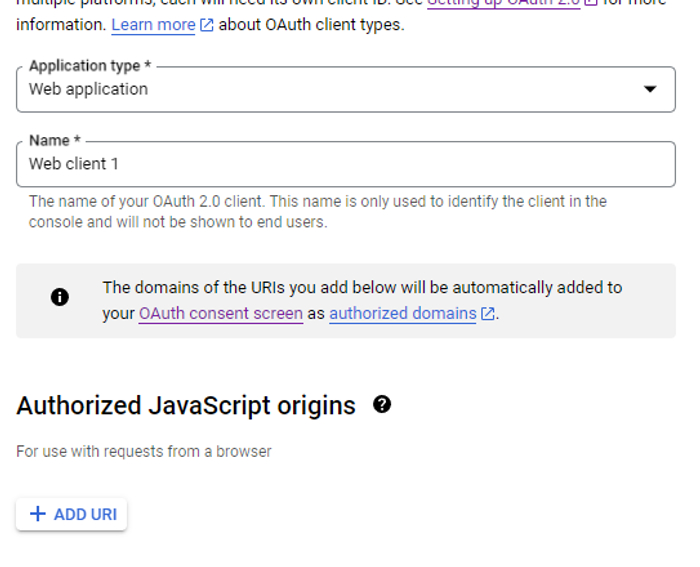
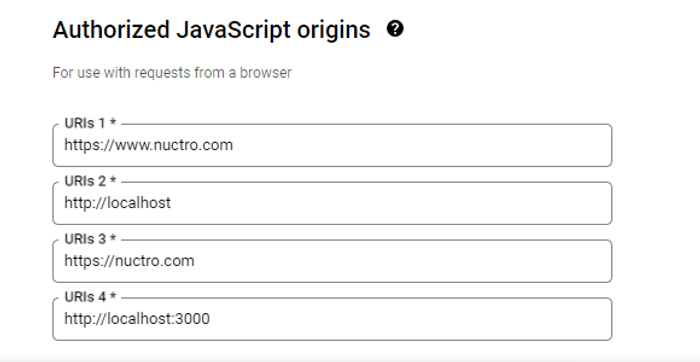
Click on Add URI
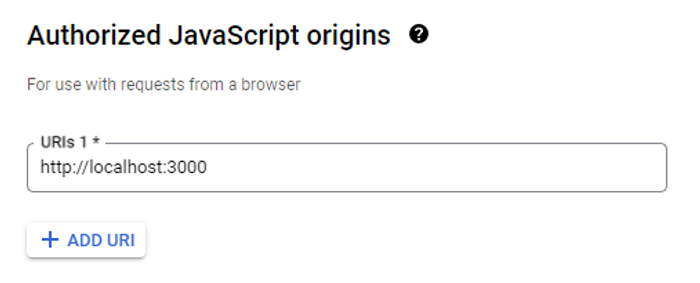
Authorized JavaScript origins refers to the origin of the website from where you will be accessing Google Identity One Tab. When testing in localhost, we currently set the URL as localhost, but in production, make sure to point to the live URI. If you encounter an error in your console stating that Given origin is not allowed for the given client ID then you need to add one more URI: http://localhost.
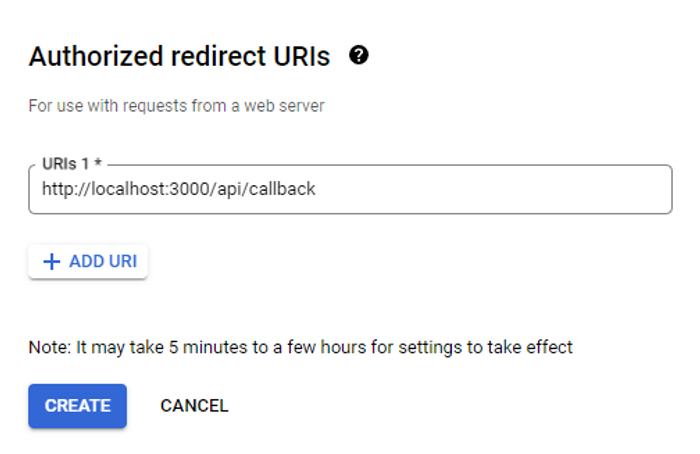
Update your auth redirect URLs following the same rules as your origin URI. Remember to update it before deploying in production. Click on the CREATE button.
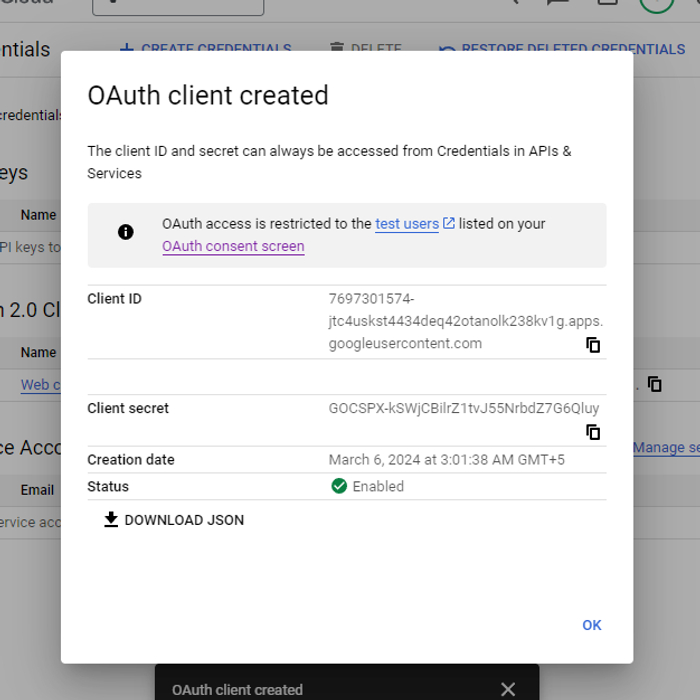
Congratulations! Your OAuth ID has been created. Now, let's write the code to integrate Google Identity into your NextJS project. I enjoy coding.
NextJS Setup, Let's code!
To integrate Google authentication with your NextJS project, you need to install both next-auth and google-auth-library.
npm i next-auth google-auth-library
Change your .env.local file
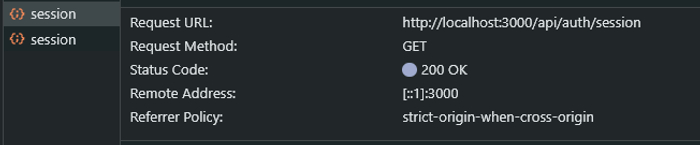
To configure your project, you need to add the following key-value pairs to your .env.local file. Set your NEXTAUTH_URL to http://localhost:3000 during development and change it to your live URL in production. The CLIENT_SECRET is a server value that cannot be accessed by the frontend. If you need a hint on where to find the CLIENT_SECRET value, refer to the previous image. The NEXT_PUBLIC_GOOGLE_CLIENT_ID can be accessed by both the frontend and backend. We will use it to connect the frontend and backend to Google identity. Finally, to encrypt and decrypt your token, you can generate a JWT token by clicking on this link https://generate-secret.vercel.app/32.
NEXT_PUBLIC_GOOGLE_CLIENT_ID=10787974xxxxxxxxxxxxxxxxxxxxx.apps.googleusercontent.com
GOOGLE_CLIENT_SECRET=GOCSPXxxxxxxxxxxxxxxxxLM39
NEXTAUTH_URL=http://localhost:3000
JWT_SECRET = fasf4545changeeeeme5667rtfw34r4f
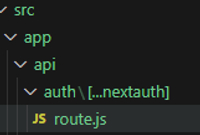
To set up an API in your NextJS project, create a new folder called API within the "/app" folder. Inside the "/api" folder, create a new folder called auth. Within the "auth" folder, create another folder called "[...nextauth]", ...nextauth will accept all parameter values from this API. Finally, create a "route.js" file.
Crate a Google Idienty api
Copy and paste the following code snippet into your route.js file. The next-auth library by Vercel handles all authorization functionality for NextJS. Import OAuth2Client from the google-auth-library, an official Google package. /route.js
import NextAuth from "next-auth"
import GoogleProvider from "next-auth/providers/google";
import CredentialsProvider from 'next-auth/providers/credentials'
import { OAuth2Client } from 'google-auth-library'

const googleAuthClient = new OAuth2Client(process.env.NEXT_PUBLIC_GOOGLE_CLIENT_ID)
const handler = NextAuth({
    providers: [

        // connect with google api internally
        CredentialsProvider({
            id: 'Nuctro',
            name: 'Nuctro',
            credentials: {
                credential: { type: 'text' }
            },
            authorize: async (credentials) => {
                const token = credentials.credential
                const ticket = await googleAuthClient.verifyIdToken({
                    idToken: token,
                    audience: process.env.NEXT_PUBLIC_GOOGLE_CLIENT_ID
                })
                const payload = ticket.getPayload()
                if(!payload){
                    throw new Error('Cannot extract payload from signin token')
                }
                // User detail of login user
                const {email, name, picture: image} = payload
                const user = {email, name, image}
                return user
            }
        })
    ],
    secret: process.env.JWT_SECRET,
})

export { handler as GET, handler as POST }
Create hooks that allow access to the Google Identity API.
This hook handles login functionality. It communicates with the API and allows users to log in using Google authentication.
import { useEffect, useState } from 'react'
import { useSession, signIn, signOut } from 'next-auth/react'
const useGoogleIdentify = (props) => {
    const url = 'https://accounts.google.com/gsi/client'
    const { data: session, status } = useSession()

    // session, you can get the user detail that are stored in the session
    const [isLoading, setIsLoading] = useState(true)
    const [isSignedIn, setIsSignedIn] = useState(true)

    // State to to track the status of login process.
    const { nextAuthOpt, googleOpt } = props || {}

    // check the status of if user is login or not if not then sign will never be true.
    useEffect(() => {
        if (!isLoading && !session) {
            setIsSignedIn(false)
        }
    }, [session, isLoading])

    // check the status will connecting with google identiy api.
    useEffect(() => {
        if (status) {
            if (status === "loading") {
                setIsLoading(true)
            }
            else {
                setIsLoading(false)
            }
        }

    }, [status])

    useEffect(() => {

        // On first time client side render, insert a script tag to the dom
        let script = document.createElement('script')
        script.async = true
        script.src = url
        document.head.appendChild(script)
        if (!isLoading && !isSignedIn) {
            const { google } = window
            if (google) {
                google.accounts.id.initialize({
                    client_id: process.env.NEXT_PUBLIC_GOOGLE_CLIENT_ID,
                    callback: async (response) => {

                        // **Here you will get all your user detail**

                        setIsLoading(true)
                        await signIn('Nuctro', {
                            credential: response.credential,
                            ...nextAuthOpt
                        })
                        setIsLoading(false)
                    },
                    ...googleOpt
                })
                // For the one tab connection
                if (googleOpt.isOneTap) {
                    console.log(google.accounts)
                    google.accounts.id.prompt((notification) => {
                        if (notification.isNotDisplayed()) {
                            console.log('getNotDisplayedReaseon: ', notification.getNotDisplayedReason())
                        } else if (notification.isSkippedMoment()) {
                            console.log('isSkippedMoment: ', notification.getSkippedReason())
                        } else if (notification.isDismissedMoment()) {
                            console.log('isDismissedMoment: ', notification.getDismissedReason())
                        }
                    })
                }

            }
        }
    }, [googleOpt, isLoading, isSignedIn, nextAuthOpt])
    // returning all the status of api transition while user is getting login.
    return { isLoading, isSignedIn, signOut }
}

export default useGoogleIdentify
Create a client side componet for creating wrapper for session provider context. If dont write this then you will not be able to get the session information that is stored by CredentialsProvider function in the api.
"use client";
import { SessionProvider } from "next-auth/react"

import React from 'react'

const SessionWrapper = ({children}) => {
  return (
    <SessionProvider>{children}</SessionProvider>
  )
}

export default SessionWrapper
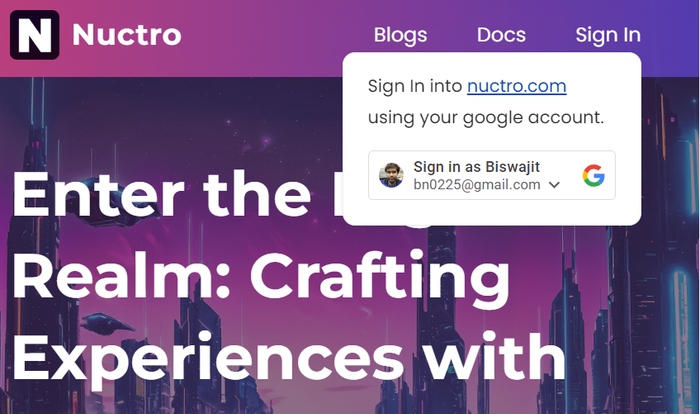
Create a client component for the login button. Place this component wherever you want to show the login button. This component will handle the logic for one tab functionality. However, please note that if you enable one tab functionality before your app is approved and published by Google, it will not work. This may cause your UI to break and appear as a transparent overlay on the screen, making it impossible to click your navigation bar menu. It's best to keep this feature disabled until your app is published. But don't worry, you can still deploy your code in production and access the cool Google login button. To learn how to personalize the Google login button, please visit this link after completing the article: https://developers.google.com/identity/gsi/web/guides/personalized-button.
"use client";
import useGoogleIdentify from "@/app/hooks/useGoogleIdentify";

export default function GoogleLoginButton() {
    const nextAuthOpt = {
        redirect: true
    }
    const googleOpt = {
        // to enable disable one tab.
        isOneTap: true
    }
    const { isSignedIn, isLoading, signOut } = useGoogleIdentify({
        nextAuthOpt, googleOpt
    })
    return (
        <>
            {!isSignedIn && <button onClick={()=> signOut()}>Log Out</button>}
            {!isSignedIn && <div className="g_id_signin"
                data-type="standard"
                data-size="large"
                data-theme="outline"
                data-text="sign_in_with"
                data-login_uri="http://localhost:3000"
                data-shape="rectangular"
                data-logo_alignment="left">
            </div>}
            {isSignedIn && <button onClick={()=>signOut()}>Sign Out</button>}
        </>

    )
}
In the layout page, wrap your session wrapper component around the root component. This will help to properly organize and structure your components. /app/layout.js
import { Poppins, Montserrat, Noto_Sans } from "next/font/google";
import { sendGAEvent } from '@next/third-parties/google'

import ClientSideComp from "@/componets/clientSideComp";
import SessionWrapper from "@/componets/clientSessionWraper";

export default function RootLayout({ children }) {
  return (
    <SessionWrapper>
      <html lang="en">
        <head><meta /></head>
        <body >{children}</body>
      </html>
    </SessionWrapper>
  );
}
Adding login button on your home page.
You can add a login button anywhere in your user interface and display the Google button to allow users to log in using their Google account. /app/page.js
import Navbar from "@/componets/nav";
import styles from "./index.module.css"
import Link from "next/link";
import ButtonDesign from "@/componets/button";
import Footer from "@/componets/footer";
import connectMongo from "@/middleware/database";
import Article from "@/componets/article";

export default async function Page({ params: { slug } }) {
  return (
    <>
      <Navbar />
      <div className="container">
        <GoogleLoginButton />
      <Footer/>
    </>
  )
}
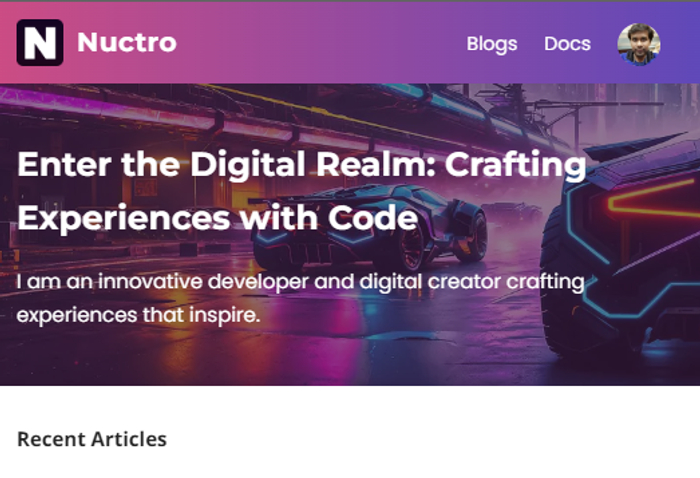
Output:
Publishing app for production
Open the OAuth consent screen page by clicking on OAuth consent screen in the left sidebar of your Google console page. Make sure to update the Authorized JavaScript Origins with live URLs in the Credential page.
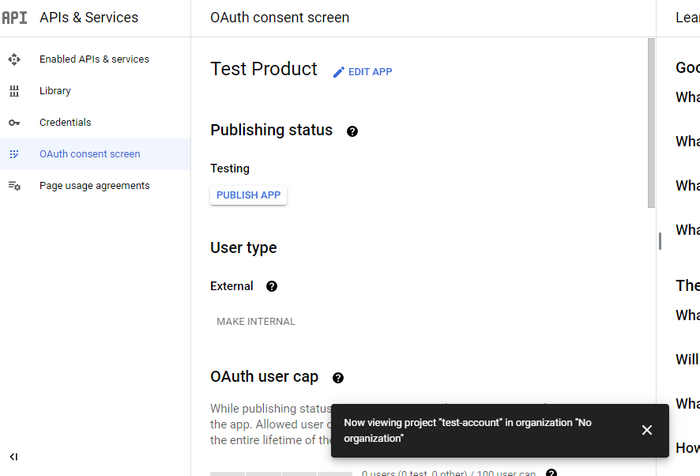 To publish the app, please click on the PUBLISH APP button.
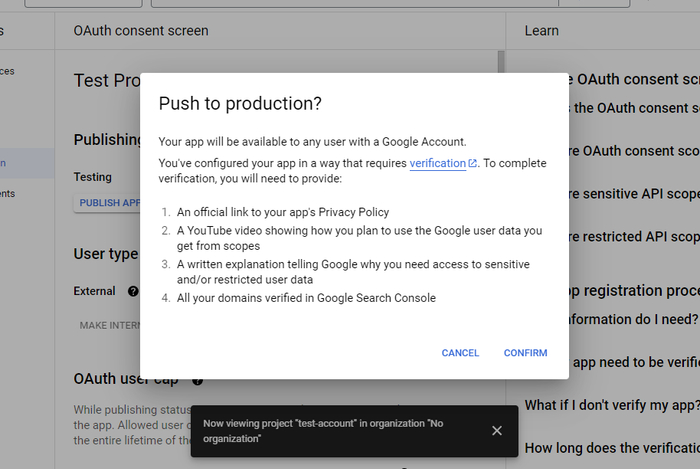 Click on the CONFIRM button to confirm that you are ready for Google to push the account.
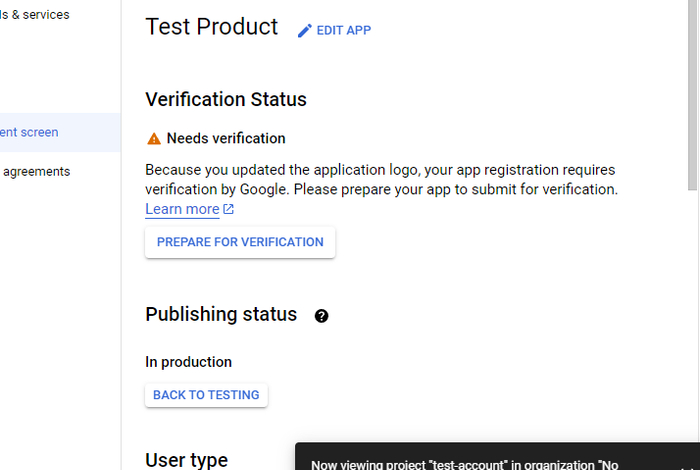 Click on the button PREPARE FOR VERIFICATION to proceed.
 Enter your app information and app domain details.
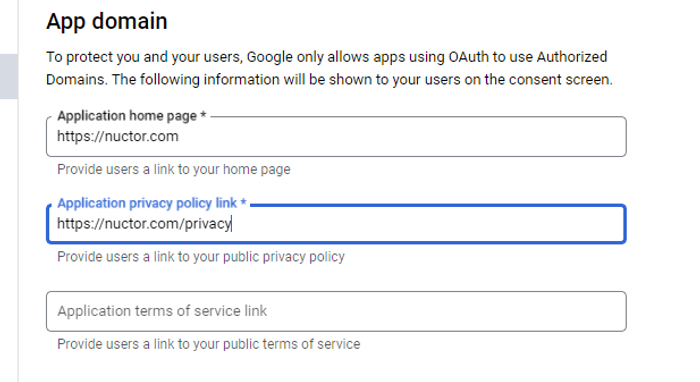 In the App Domain section, enter the link to your application's homepage and privacy policy. If you don't have a privacy policy link, you can generate one using an online policy generator website.
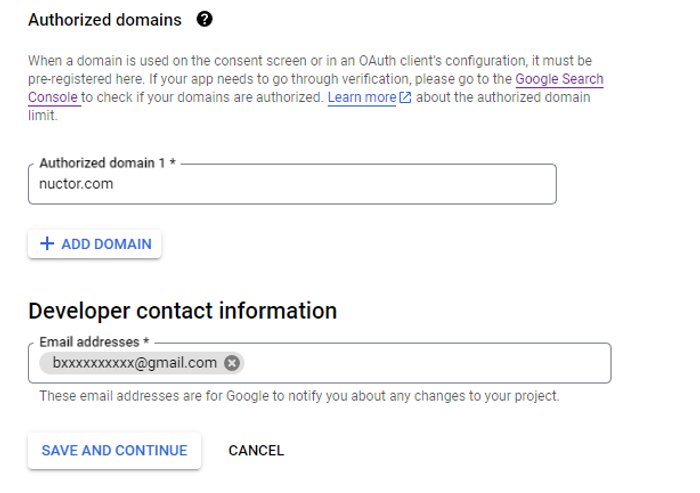 In the Authorized domains section, add your live domain name. Then click the Save and Continue button at the bottom of the page.
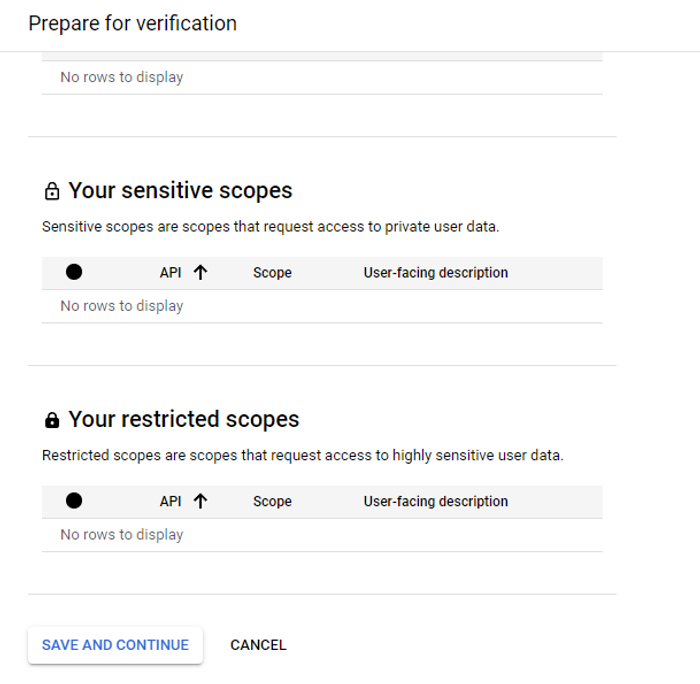 In the Scope page and click on the SAVE AND CONTINUE button.
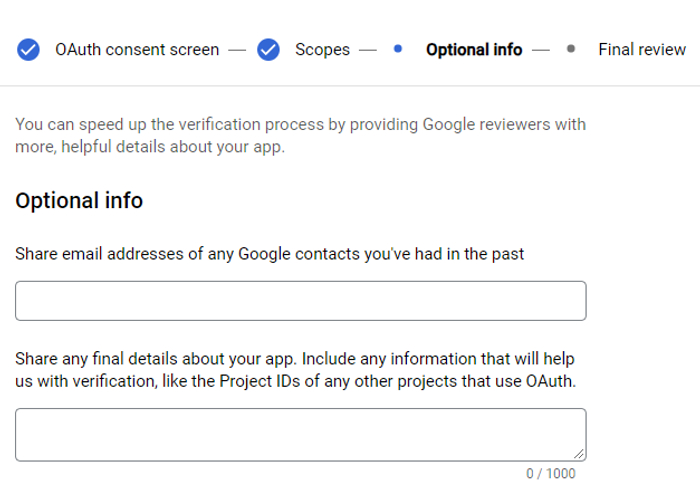 Click on the SAVE AND CONTINUE button below without filling in any inputs on this optional info page.
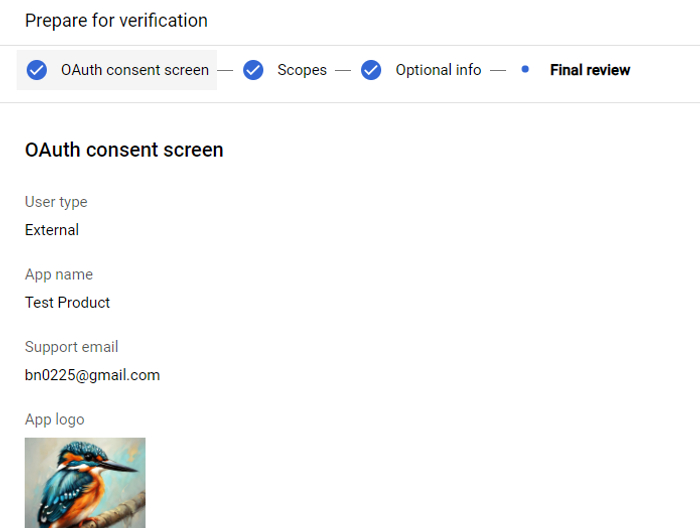 On the final review page, check the data policy checkbox and click "Submit for Verification".
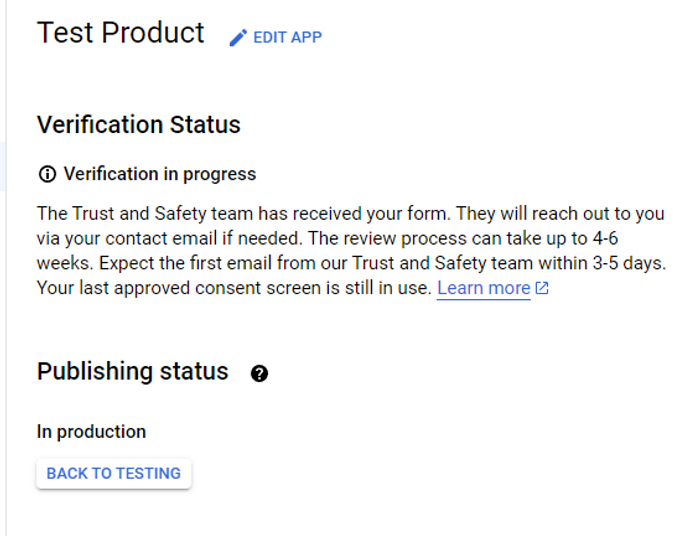 Wait for the verification process to complete. However, you can still access the login button in production.
Comments
Loading...