Setup Google Analytics 4 and NextJS 14 - Step by Step

Biswajit NayakFollow me on Linkdin ![]()
3 Min Reading, March 1, 2024
Why We Need Google Analytics
Google Analytics is a powerful and robust tool to track the record of web visitor analytics information. It helps to understand how many people are visiting most frequently, from where they have been redirected, and which pages they are visiting. These data are essential for creating marketing strategies.
Setup Google Analytics 4
First, you need to create an account in the Google console:
- Go to https://analytics.google.com.
- Sign in using your Google account.
- Click on "Admin".

- Create an analytics account by clicking Account in the dropdown.
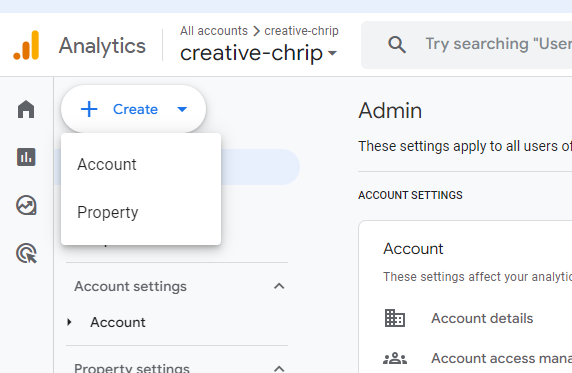
- Fill in all the required inputs in the widget.
Account details
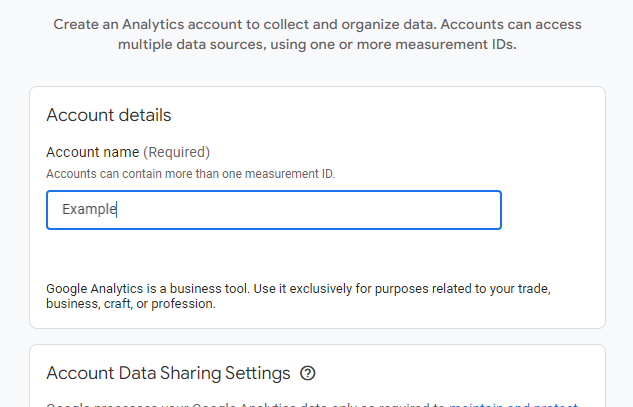
In the account details widget, the account name will be your project name or your domain name; you can add anything. Once you have filled out all the required inputs, click on the Next button below the page.
Property Creation
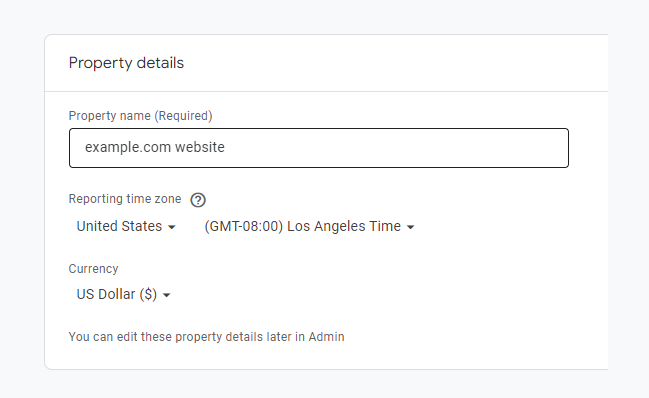
Enter the property name, set your time zone, and set your currency. Once you have filled out all the required inputs, click on the Next button below the page.
Business Detail
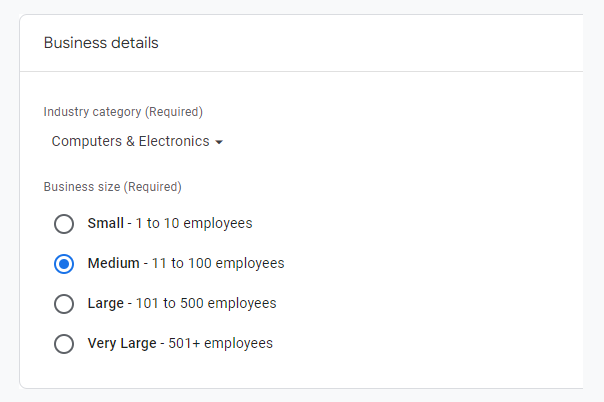
Select your industry category and business size. Once done, click on the Next button below the page.
Business Objective

Choose business objectives that suit your business. Once done, click on the Create button below the page. A Google Analytics Terms of Service Agreement popup will show; accept the agreement to continue.
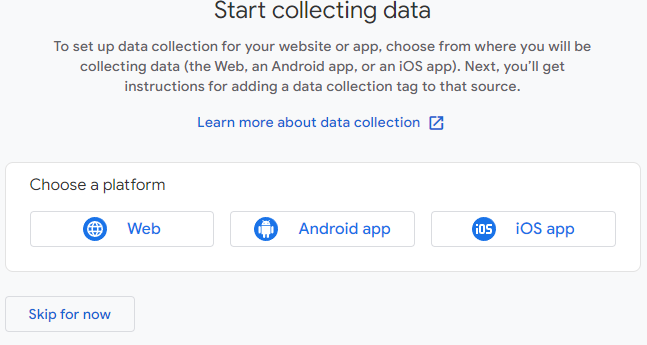
- Finally, choose a platform, or you can skip it, but I have selected web.
- Set up your data stream.
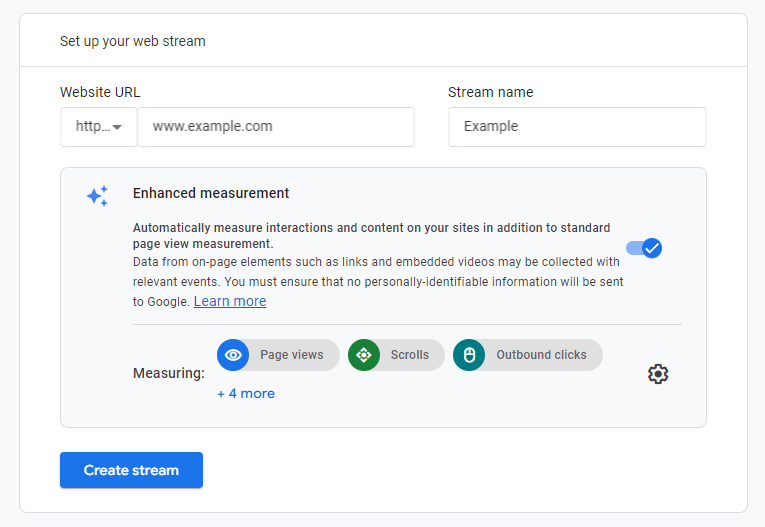
Fill in your website URL and stream name, then click on the Create Stream button. A web stream popup will open, which will show all your web stream details.
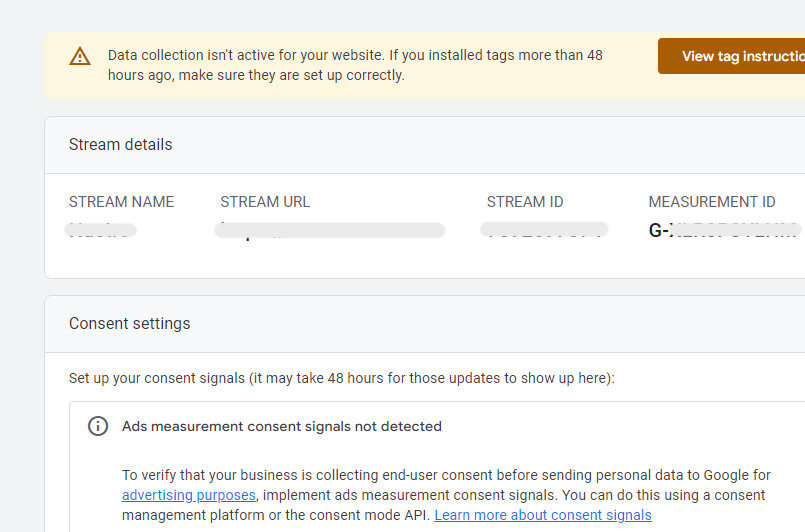
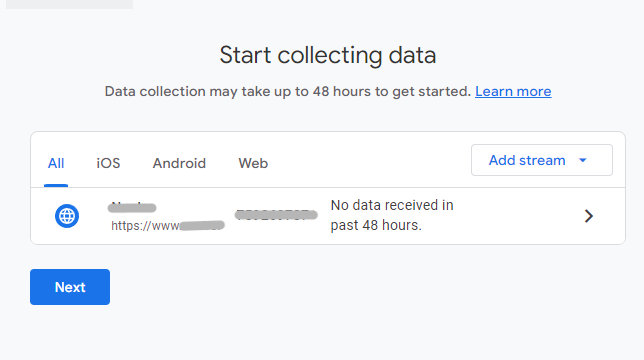
Close this web stream details popup and simply click on the next button in the start collecting widget. The Data Collection is Pending page will show; just click on Continue to Home below the page.
Click on the home button and get your Measurement ID. This ID is going to be used in our frontend code.
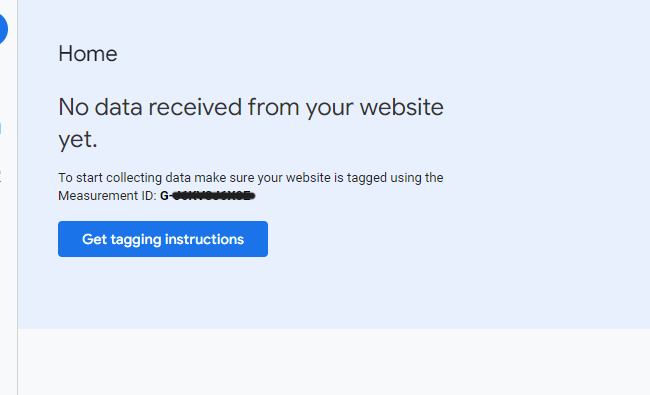
That's all about configuring the Google Analytics website.
Setting up in Next.js
Install the official package third-party library by Next.js:
npm i @next/third-parties
Create a layout.js file inside the /app directory if it's not already there.
import { GoogleAnalytics } from '@next/third-parties/google'

export default function RootLayout({ children }) {
  return (
    <html lang="en">
      <body>{children}</body>
      <GoogleAnalytics gaId="G-XYZ" />
    </html>
  )
}
You need to add <GoogleAnalytics gaId="G-XYZ" /> inside the layout page, just after the body tag. Enter the GA ID value, which is your Measurement ID. That's all you need to do to connect to your GA account.
To check the live users on your local machine, create a client component.
'use client'

import { useEffect } from "react";
import { sendGAEvent } from '@next/third-parties/google'

const InitalLoadActiveUsers = () => {
    useEffect(()=> {
        sendGAEvent({ event: 'cookieDomain', value: 'none' })
    }, [])
    return ("")
}

export default InitalLoadActiveUsers
Add this component to your layout page.
export default function RootLayout({ children }) {
  return (
    <html lang="en">
      <body>{children}</body>
      <GoogleAnalytics gaId="G-XYZ" />
      <InitalLoadActiveUsers/>
    </html>
  )
}
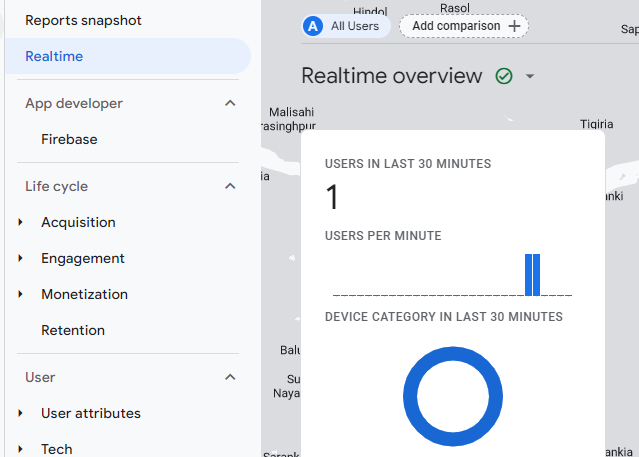
Open your analytics console and click on Report. From the report sidebar, click on Realtime. If everything is properly set, then it will start showing updates.
Comments
Loading...